Sometimes, the best way to find out what’s going on underground is to literally go underground.
That’s why Bernardita Sallato of Washington State University recommends digging soil pits to assess orchard soil conditions. With a little digging, some sweat and a couple of dirty knees, a grower can learn details about soil structure, texture, soil depth, pH estimates and more from the walls of a soil pit.
Sallato, a tree fruit extension specialist, has a soil science background from her home country of Chile, where cherry growers and researchers use pits more often. In fact, she was somewhat surprised to see so few in Washington when she arrived four years ago.
She occasionally gets calls from growers asking for help diagnosing nutrition or irrigation problems, and she’s found that an up-close and personal look at — and feel of — the soil can reveal more clues.
“Sometimes the solution of the problem comes directly from observing that soil (profile) and where your roots are growing,” she said.
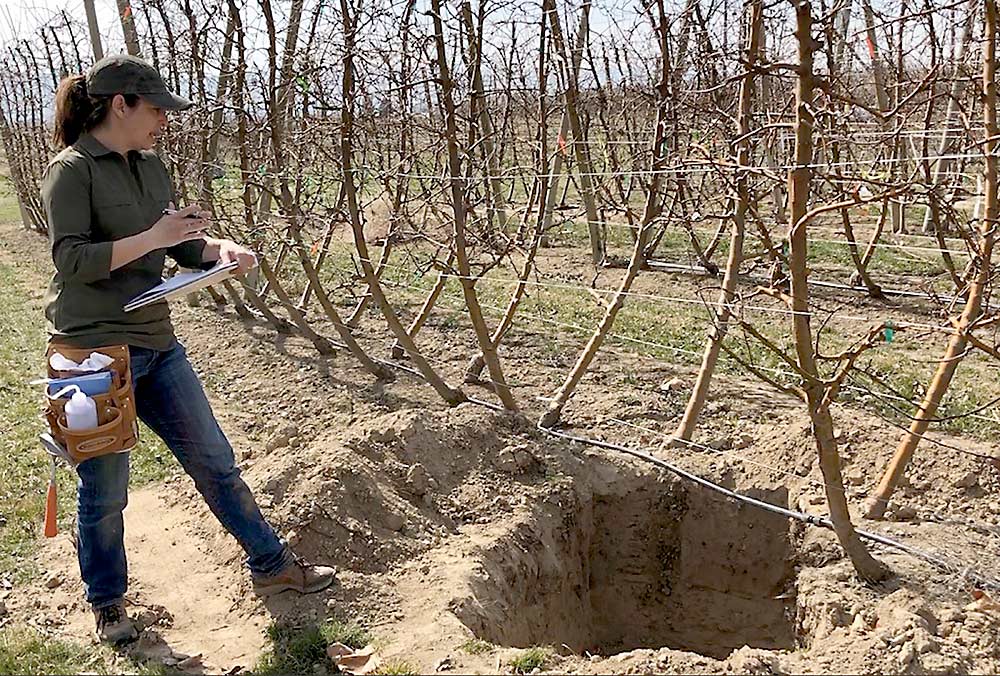
The pits she recommends are relatively simple, usually holes 3 feet deep and about 3 feet wide, big enough to crawl inside and crouch on your knees, dug near a growth condition that needs investigation. Dig within the orchard row where roots and irrigation reach, she said. There’s no sense digging a pit in the middle of the alley.
Hans Engelke, a Basin City, Washington, cherry grower, is a believer.
About three years ago, he asked Sallato to help him with his 12-acre block of Chelan cherries that showed symptoms similar to chlorosis, a nutrient deficiency. Sallato convinced him to dig nine pits throughout the small orchard. He used a 24-inch auger mounted to the back of his tractor. No digging required.
They determined his orchard, while on a good site for frost control, had variable depths of top soil on top of hard clay, most likely leveled in the 1950s for row crops, leaving little room for root growth.
Sallato recommended he convert from 12-hour irrigation cycles to three hours, to accommodate the shallow roots, and switch irrigation sprinkler nozzles. Over two years, he noticed improvement and ended up cutting his water use by 50 percent.
“I think we did improve what we possibly could,” he said.
However, for the 25-year-old big trees on deep-reaching Mazzard rootstocks, the adjustments could only mitigate so much. Now that little cherry disease has taken hold in his orchard, and the rest of the state, he plans to phase out the orchard in a few years and not replant. He and his family mostly rely on row crops, anyway; the cherry orchard was always a side project.
However, if he planned to continue cherry growing, he would use soil pits to scout land before he even planted, he said.
The agriculture industry is mechanizing rapidly but it helps to consider some simpler techniques, Engelke said, “like a low-blow approach to dig a hole in the ground.”
Dig in
From Bernardita Sallato, tree fruit extension specialist at Washington State University in Prosser, here are the steps to dig and analyze some soil profile indicators in a soil pit:
—Choose a site with a condition you want to evaluate, digging the pit between trees and near root growth and irrigation.
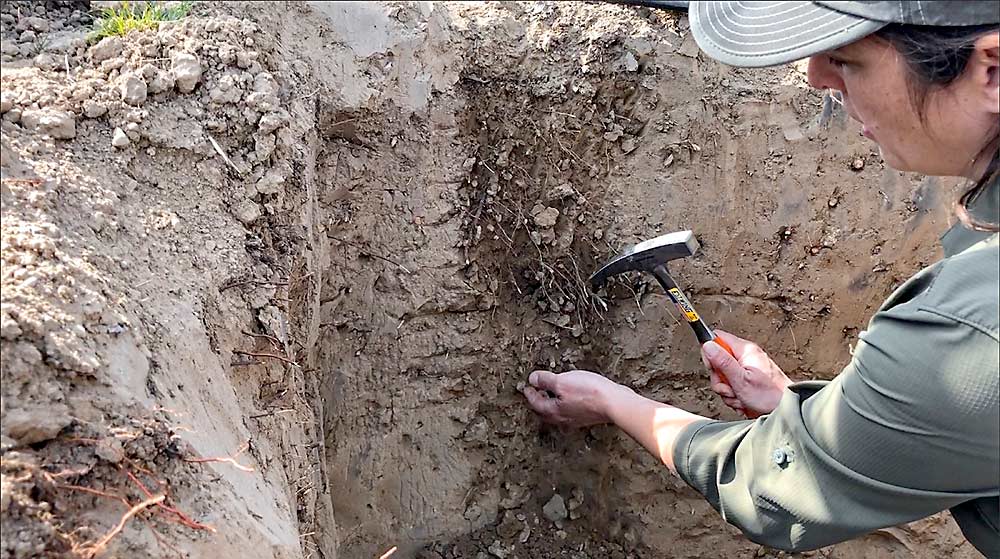
—Working top to bottom, chip at the pit wall with a soil pick to determine layers based on changes in moisture, root density and the pressure required to dislodge clumps. Measure the depth of each layer.
—Using the soil pick, assess soil structure by collecting a handful, squeezing it and noting how easily the clumps break apart and the size of the granules leftover in your hand.
—Determine root growth, root size and soil porosity by comparing holes in the pit wall with a porosity chart. (Click here for a root chart and click here for a soil chart.)
—Mix soil and water in your hand to create a soil ribbon to identify texture — sand, silt, loam or clay. That will help determine how well your soil holds nutrients and water.
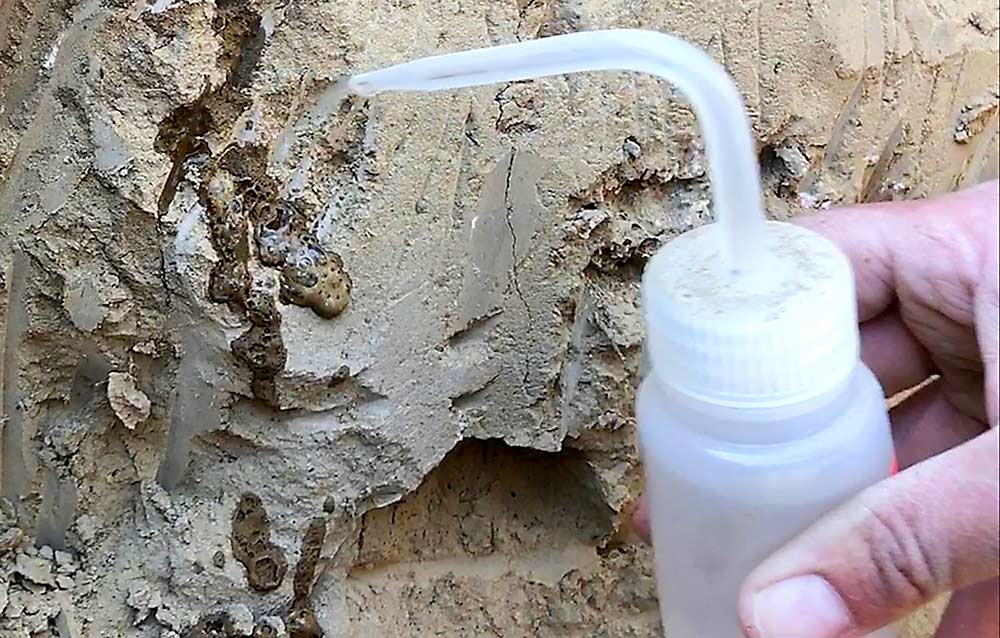
—Working top to bottom, spritz the pit wall with hydrochloric acid (HCl 1N). A bubbly reaction indicates the presence of calcium carbonate, which affects soil pH and, therefore, root growth.
—by Ross Courtney
Related:
—Measuring the soil’s charge


Leave A Comment